Introduction:
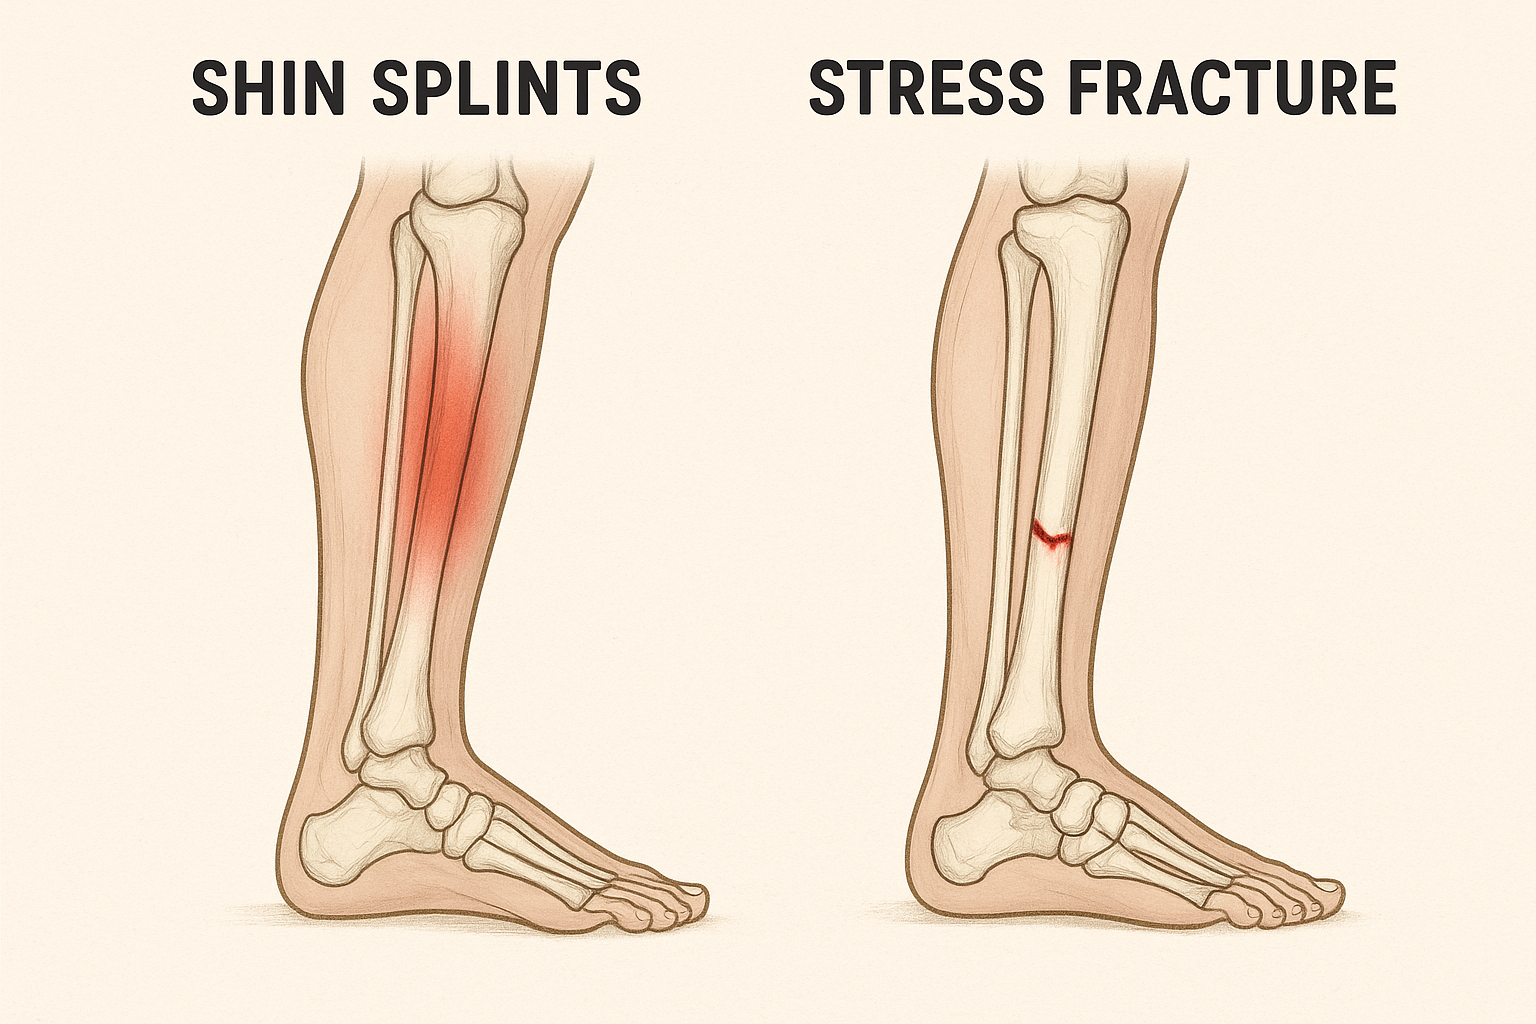
For runners, athletes, or anyone who likes to be active, shin pain can be annoying and even dangerous. Stress fractures and shin splints (medial tibial stress syndrome) are two of the most frequent causes of shin pain. Although the two disorders may initially feel similar, they need different approaches to therapy, and a misdiagnosis may result in a prolonged recovery or even irreversible harm.
Let’s examine how to distinguish between a stress fracture and a shin splint, as well as viable treatment options.
What Are Shin Splints?
An overuse injury known as a “shin splint” causes inflammation in the muscles, tendons, and bone tissue surrounding your shinbone (tibia). They are prevalent in:
- Those who boost their training too rapidly
- The beginning of a new sport by athletes
- Individuals with bad footwear or flat feet
🩺 Symptoms of Shin Splints:
- Shin splint symptoms include dull, aching pain in the front or inside of the shin.
- Pain may get better when you rest and get worse when you move.
- An expanded tender spot along the shinbone
- Most of the time, there is no obvious bruising or swelling.
What Is a Stress Fracture?
A stress fracture is a small crack in the bone brought on by repeated effort, usually as a result of poor biomechanics or overtraining. A stress fracture is a bone ailment rather than a soft tissue problem, in contrast to shin splints.
🩺 Symptoms of a Stress Fracture:
- A sharp, localized pain in a small area on the shin is a sign of a stress fracture.
- Pain that does not go away with rest and gets worse when you’re moving.
- Pain even when standing or walking.
- Potential bruising or swelling around the fracture site.
Shin Splints vs Stress Fracture: Quick Comparison Table
| Feature | Shin Splints | Stress Fracture |
|---|---|---|
| Pain Type | Dull, aching | Sharp, stabbing |
| Pain Location | Broad area along the shin | Specific, pinpoint location |
| Pain During Rest | Rare or mild | Often persists, especially at night |
| Swelling/Bruising | Usually absent | Sometimes present |
| X-ray/MRI Needed? | Not usually | Yes, MRI or bone scan for confirmation |
How to Diagnose the Condition
If you’re unsure whether it’s shin splints or a stress fracture, consult a physiotherapist or sports doctor. They may recommend:
- Physical evaluation: weight-bearing exercises, pain mapping
- Imaging: For stress fractures, MRI is more accurate than X-ray.
- Biomechanical analysis: To identify muscular imbalances or problems with gait
🧪 Physical Tests for Shin Splints vs. Stress Fracture
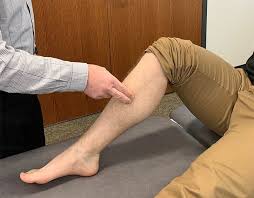
✅ 1. Palpation Test (Tenderness Mapping)
- How to do it: Apply pressure along the tibia’s (shin bone) inner edge.
- Shin Splints: The bottom third of the tibia is tender and dispersed, typically extending more than 5 cm.
- Stress Fracture: The pain is intense and restricted to a tiny area (1-2 cm).
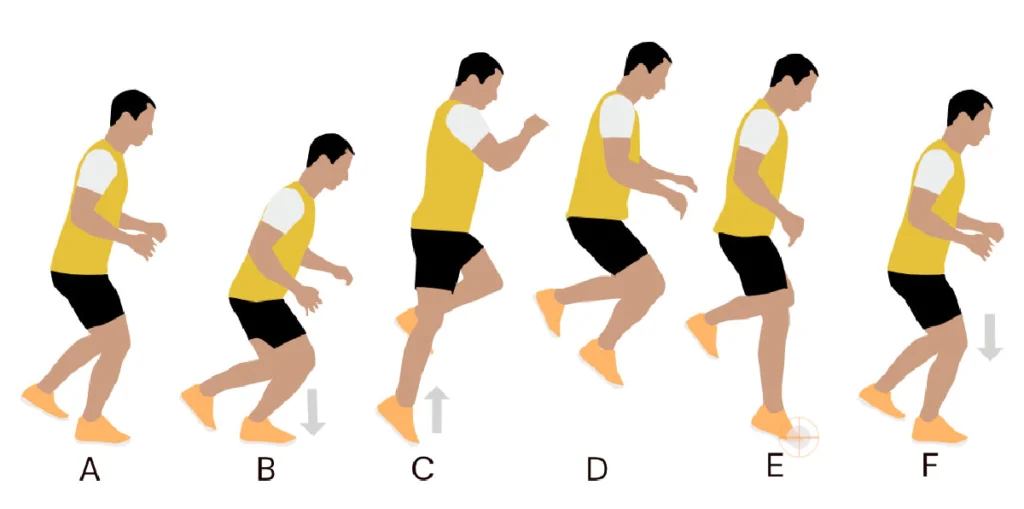
✅ 2. Single-Leg Hop Test
- How to do it: Ask the patient to hop on the affected leg.
- Shin Splints: Mild to moderate discomfort, usually tolerable.
- Stress Fracture: Sharp, unbearable pain; unable to complete the hop due to pain.
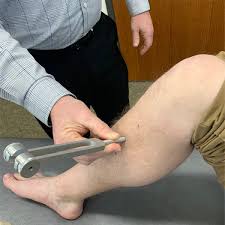
✅ 3. Tuning Fork or Percussion Test
- How to do it: Press a vibrating tuning fork against the area that hurts.
- Shin Splints: Usually don’t cause any pain.
- Stress Fracture: Because of the sensitivity of bone cracks, vibration produces intense localized discomfort.
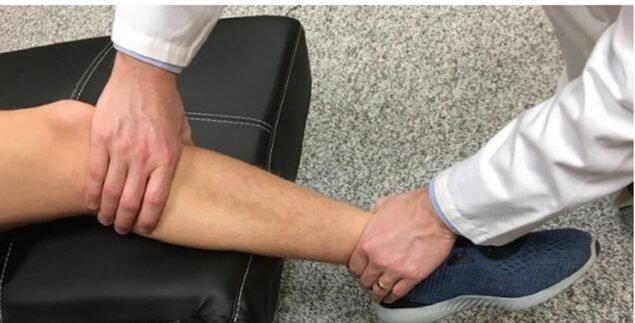
✅ 4. Fulcrum Test
- Procedure: The patient sits with their legs hanging down. The therapist applies light pressure to the knee, providing a bending force, while positioning the forearm beneath the mid-tibia.
- Shin Splints: There isn’t a noticeable rise in discomfort.
- Stress Fracture: might resemble a positive fracture sign and cause intense, localized pain on the tibia.
✅ 5. Hop-to-Walk Comparison
- How to perform: Compare pain intensity between walking and hopping.
- Shin Splints: Pain may i’ncrease slightly but remains dull.
- Stress Fracture: Hopping significantly worsens pain, indicating bony involvement
🦵 Rehab Plan for Shin Splints (Medial Tibial Stress Syndrome)
🔹 Phase 1: Acute Phase (0–2 weeks)
Goals: Reduce pain, control inflammation, avoid aggravation
Interventions:
- Relative rest: cut back on or quit running or jumping
- Ten to fifteen minutes of ice massage, three to four times a day
- Stretches for the calf and tibialis anterior
- Treat foot mechanics with temporary orthotics or arch taping.
- Release of soft tissue to the calf and shin muscles
🔹 Phase 2: Subacute Phase (2–4 weeks)
Goals: Restore flexibility, begin strengthening
Interventions:
- Strengthening of the tibialis anterior, calf, and peroneals
- Using a wobble board or a single-leg stand to practice balance
- Using foam rolling to ease tense muscles
- Cross-training lightly (cycling, swimming)
- Review running technique and gait with a physiotherapist.
🔹 Phase 3: Return to Sport (4–6 weeks onward)
Goals: Gradual return to load-bearing and sport
Interventions:
- Programs for walk-runs that progress (e.g., 1 minute run, 1 minute walk × 10)
- When pain-free, plyometric exercises (hops, leaps)
- Keep stretching and strengthening.
- Long-term shoe adjustments and, if necessary, orthotics
🦴 Rehab Plan for Tibial Stress Fracture
⚠️ Stress fractures need strict offloading early to allow the bone to heal. A rushed return can lead to complete fracture.
🔹 Phase 1: Bone Healing Phase (0–6 weeks)
Goals: Absolute rest from high-impact activities
Interventions:
- Weight-bearing with crutches or non-weight-bearing (NWB)
- No sprinting, jumping, or leg loading
- Only pain-free activities: swimming and upper-body exercises
- Pool rehabilitation or an antigravity treadmill, if available
- Nutritional assistance (vitamin D, calcium)
🔹 Phase 2: Transition Phase (6–8 weeks)
Goals: Begin gentle loading, restore function
Interventions:
- Progressive weight-bearing based on clearance and pain
- Start with lower limb (hip, quad, and calf) isometric exercises and progress to isotonic ones.
- Easy mobility exercises for the feet and ankles
- Training for balance (e.g., one-leg stance, BOSU)
🔹 Phase 3: Return to Sport (8–12+ weeks)
Goals: Controlled reintroduction to running and sport
Interventions:
- Start the walk-jog intervals.
- Drills including jumping and skipping (painless exclusively)
- Address overuse or biomechanical mistakes (e.g., poor hip control, flat feet).
- Sport-specific exercises combined with functional training
👣 Orthotics & Footwear for Shin Splints vs. Stress Fracture
🦵 1. SHIN SPLINTS (Medial Tibial Stress Syndrome)
🔹 Cause:
Often due to overpronation, poor shock absorption, or improper footwear during running or jumping.
✅ Recommended Orthotics:
| Orthotic Type | Description | Purpose |
|---|---|---|
| Over-the-counter arch supports | Soft inserts with medial arch support | Help reduce excessive foot flattening during gait |
| Custom-made orthotics | Professionally designed based on gait and foot scan | Control overpronation, improve alignment |
| Heel wedge or medial posting | Slight lift on the inner heel | Decreases stress on the posterior tibialis muscle |
👟 Recommended Footwear Features:
| Feature | Why It Helps |
|---|---|
| Motion control or stability shoes | Reduce foot overpronation |
| Good arch support | Prevents medial tibial strain |
| Shock absorption (e.g. cushioned midsoles) | Lessens load on tibia during running |
| Firm heel counter | Keeps rearfoot stable, improves alignment |
🛑 Avoid: Minimalist or flat shoes if patient has flat feet or overpronation.
🦴 2. STRESS FRACTURE (Tibial or Metatarsal)
🔹 Cause:
Often due to poor shock absorption, excessive impact loading, or poor bone mechanics. Risk increases with high-impact sports, improper shoes, and rigid surfaces.
✅ Recommended Orthotics:
| Orthotic Type | Description | Purpose |
|---|---|---|
| Cushioned full-length orthotics | Distribute forces across the foot | Reduce tibial bone loading |
| Metatarsal pads (if forefoot fracture) | Dome-shaped pads under midfoot | Unload the stress from affected metatarsals |
| Custom carbon plate inserts | Rigid plate under foot | Limits excessive forefoot/toe movement (for runners) |
| Shock-absorbing insoles (e.g., Sorbothane) | Soft, impact-reducing material | Reduces tibial loading during heel strike |
👟 Recommended Footwear Features:
| Feature | Why It Helps |
|---|---|
| Maximum cushioning | Reduces ground impact force |
| Rocker-bottom sole | Helps offload pressure from forefoot and tibia |
| Lightweight but stable design | Decreases stress on lower leg |
| Wide toe box | Prevents compressive stress in forefoot fractures |
🛑 Avoid: Barefoot-style or racing flats during rehab; these increase tibial stress
💡 Bonus Tips for Both Conditions
- Replace running shoes every 500–800 km to ensure shock absorption is intact.
- Use gait analysis to guide orthotic and shoe choice.
- Consider temporary walking boots or offloading shoes during acute stress fracture phase